Sandwich makers have become a staple in kitchens worldwide, offering a quick, convenient way to prepare delicious meals and snacks. But with so many types and features, understanding what to look for in a sandwich maker, along with tips for care and recipe ideas, can be valuable.
In this guide, we’ll cover everything you need to know—from selecting the right model to using it effectively and keeping it in top condition. Let’s dive into all things sandwich maker, from basics to expert tips.

What Is a Sandwich Maker and how it works?
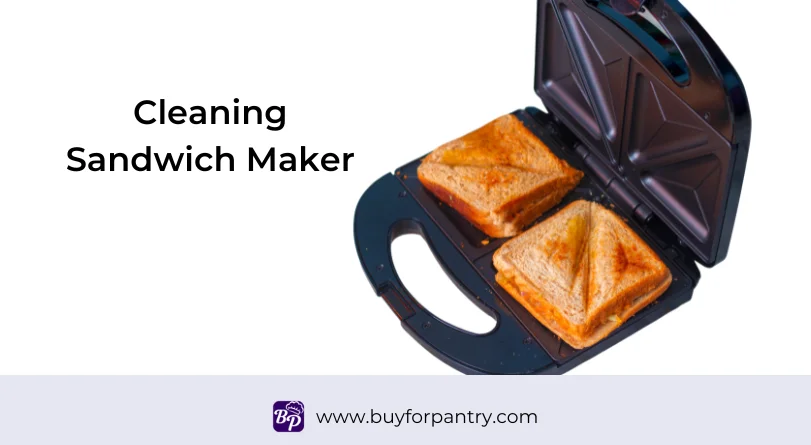
A sandwich maker, also known as a panini press, has two hinged, heated plates designed to toast and press a sandwich. It toasts the bread and melts the fillings inside by applying even heat and pressure to both sides, making it ideal for creating hot, crispy sandwiches in just minutes.
How a Sandwich Maker Works?
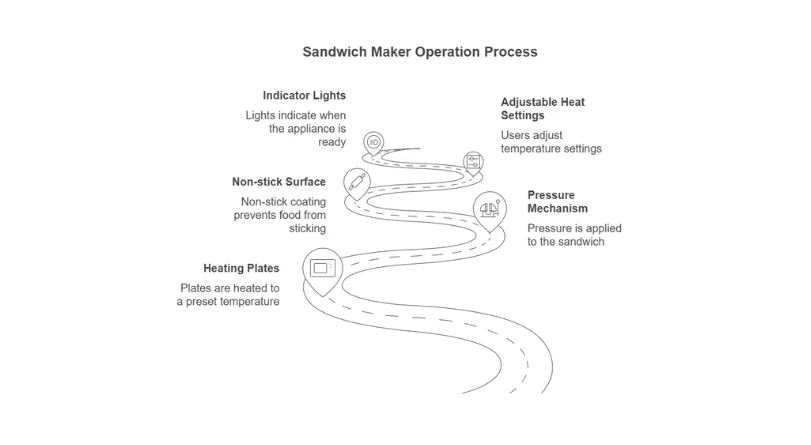
A sandwich maker, or panini press, uses two heated, hinged plates to toast and press sandwiches, providing heat from both the top and bottom surfaces. Here’s a breakdown of its working process:
- Heating Plates: The sandwich maker has two plates, one on the top and one on the bottom. When the appliance is plugged in, these plates are heated to a preset temperature (some models have adjustable settings). The heating elements in the plates provide consistent heat, cooking the sandwich evenly on both sides. This dual-sided heating significantly reduces cooking time.
- Pressure Mechanism: When the appliance is closed, it applies pressure to the sandwich. This pressure, along with the heat, flattens and compresses the bread slightly, giving it a crispy exterior. The heat melts the fillings inside, creating an even blend of flavors and textures. The pressure also helps with even heat distribution, especially for sandwiches with thicker fillings.
- Non-stick Surface: Most sandwich makers come with a non-stick coating on the plates, which prevents food from sticking. This makes it easy to remove the sandwich without tearing the bread or leaving behind residue, which also simplifies cleaning.
- Adjustable Heat Settings (Optional): Some models offer adjustable heat settings, allowing users to control the cooking temperature depending on the type of sandwich or other foods being prepared. Lower settings work well for delicate bread or lighter toasting, while higher temperatures give a deeper, golden-brown crisp to thicker sandwiches.
- Indicator Lights: Many sandwich makers include indicator lights to show when the appliance is on and when it has reached the desired temperature, ensuring that the plates are heated evenly before placing the sandwich.
Versatility of the Sandwich Maker
In addition to sandwiches, the appliance can be used to cook other flat foods, such as quesadillas, tortillas, and thin cuts of meat. Its design and temperature control offer versatility, though primarily intended for quick, pressed sandwiches.
This functionality makes the sandwich maker a convenient, efficient kitchen appliance for creating a variety of quick meals, with minimal effort and easy cleanup due to the non-stick features and compact design.
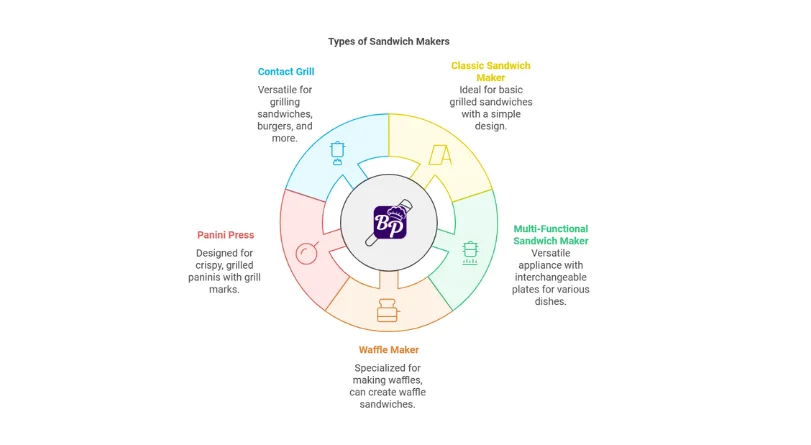
What are the different types of sandwich makers?
Here are the different types of sandwich makers that you will find widely used:
1. Classic Sandwich Maker A classic sandwich maker is a simple yet effective appliance designed to create delicious grilled sandwiches. It typically consists of two hinged plates with non-stick coatings. To use it, you simply place your sandwich filling between two slices of bread and close the lid. The heated plates press down on the sandwich, toasting the bread and melting the cheese. This type of sandwich maker is perfect for basic grilled cheese sandwiches, grilled ham and cheese, and other simple sandwich combinations.
In short classic sandwich maker:
- Straightforward design
- Two hinged plates with non-stick coating
- Ideal for basic grilled sandwiches and toasted sandwiches
- Compact and easy to store
2. Multi-Functional Sandwich Maker A multi-functional sandwich maker is a versatile appliance that can do much more than just make sandwiches. These versatile machines often come with interchangeable plates, allowing you to create a variety of dishes. You can use them to make waffles, paninis, grilled cheese, and even grilled meat and vegetables. Some models even include a grill function for added versatility. While these multi-functional appliances offer a wide range of cooking possibilities, they tend to be larger and more complex than classic sandwich makers.
Multi-function sandwich maker in short:
- Versatile appliance with interchangeable plates
- Can make a variety of dishes like waffles, paninis, grilled cheese, and more
- Often includes a grill function for cooking meat and vegetables
- More complex design and larger size
3. Waffle Maker A waffle maker is a specialized appliance designed to create delicious waffles. While not strictly a sandwich maker, it can be used to make waffle sandwiches by placing your desired filling between two waffles. Waffle makers typically feature non-stick grids that make it easy to clean. Some models offer different plate patterns to create unique waffle shapes.
A waffle maker in short:
- Specifically designed for making waffles
- Can be used to create sweet or savory waffle sandwiches
- Usually has non-stick grids for easy cleaning
- Often comes with different plate patterns for various waffle shapes
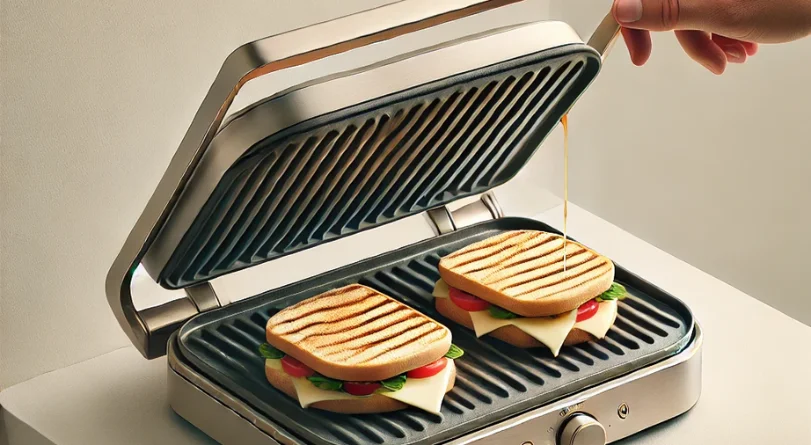
4. Panini Press A panini press is a specialized appliance designed to create crispy, grilled paninis. It features heavy-duty plates with ridges that press down on the sandwich, creating those distinctive grill marks and melting the cheese. Panini presses are perfect for making authentic Italian paninis and other grilled sandwiches.
Here is a sneak peek of Panini press:
- Ideal for making crispy, grilled paninis
- Features heavy-duty plates with ridges
- Presses the sandwich to create grill marks and melt the cheese
- Compact and easy to use
5. Contact Grill A contact grill is a versatile appliance that can be used for grilling a wide range of foods, including sandwiches, burgers, steaks, and vegetables. It features two flat, heated plates that come together to cook the food. Contact grills often have adjustable temperature settings, allowing you to cook food to your desired level of doneness. They are a great option for those who want a versatile appliance that can be used for various cooking tasks.
Here is the contact grill in short:
- Versatile appliance for grilling a wide range of foods
- Two flat, heated plates that come together to cook the food
- Can be used for grilling sandwiches, burgers, steaks, and vegetables
- Often has adjustable temperature settings for precise cooking
How a sandwich maker is different from a panini press?
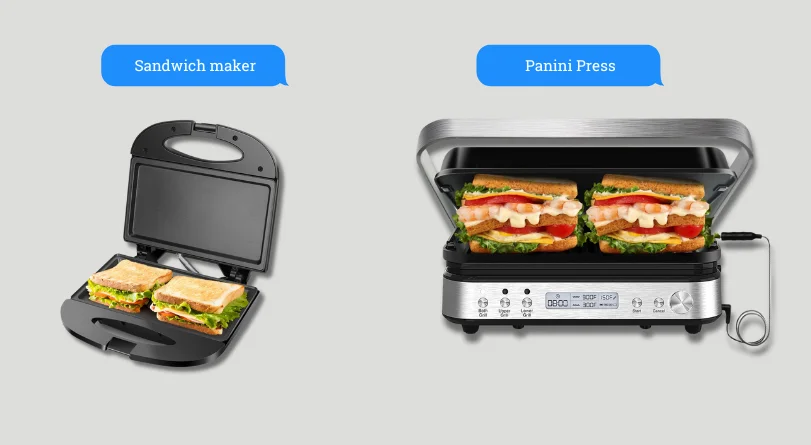
Though often mistaken for each other, a sandwich maker and a panini press serve distinct purposes. A sandwich maker is a general appliance that uses heated plates to toast sandwiches and can seal edges for simple fillings.
Conversely, a panini press is designed specifically for grilling and pressing panini-style sandwiches. It uses ridged plates, heat, and pressure—often with a spring-loaded mechanism—to create a crispy, marked exterior and melt ingredients within. While a sandwich maker is versatile, a panini press is crafted for thicker, grill-marked sandwiches.
| Feature | Sandwich Maker | Panini Press |
|---|---|---|
| Primary Design | Flat or slightly indented plates that seal the edges of bread | Ridged plates that apply firm pressure |
| Purpose | Best for basic sandwiches with minimal fillings | Ideal for thicker, panini-style sandwiches with varied fillings |
| Pressure Level | Light to moderate, minimal compression | High, often has a spring-loaded mechanism for extra pressure |
| Grill Marks | Typically lacks grill marks | Creates grill marks for a crispy, textured finish |
| Functionality | Primarily toasts and heats sandwiches | Both toasts and presses sandwiches to enhance texture |
| Versatility | Limited to simple sandwiches | Can grill meats, vegetables, and create different textures |
| Typical Size | Often smaller and more compact | Generally larger with a heavier build |
What are the advantages of using a sandwich maker over a traditional skillet?
Using a sandwich maker offers several advantages over a traditional skillet:
- Ease of Use: A sandwich maker heats both sides of the sandwich simultaneously, reducing the need to flip or monitor it constantly.
- Consistent Heating: The even heat distribution in a sandwich maker ensures a consistently crispy exterior and melted interior.
- Quick and Convenient: Sandwich makers are faster and often easier to clean due to non-stick surfaces, making them ideal for quick meals.
- Safety Features: Many sandwich makers have automatic shut-off functions, reducing the risk of overcooking or burns.
- Compact and Energy-Efficient: Smaller and more energy-efficient than a skillet on a stovetop, they are a practical option for single or small servings.
These features make a sandwich maker a convenient, time-saving appliance for toasted sandwiches and similar foods.
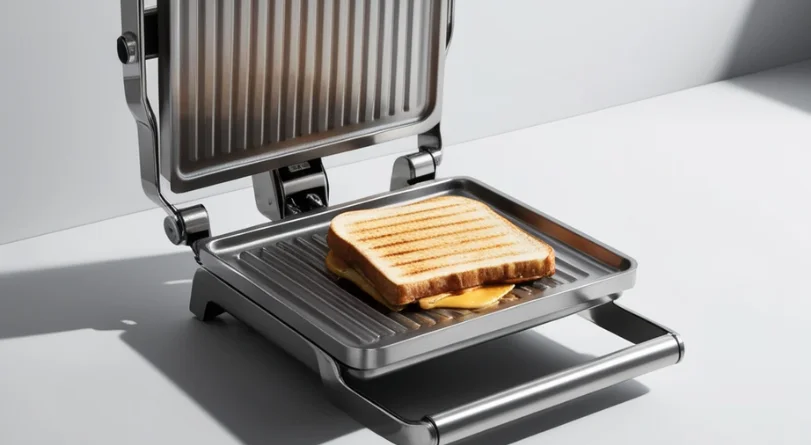
How do I use a sandwich maker properly?
To use a sandwich maker properly, follow these steps:
- Preheat the Sandwich Maker: Plug it in, and wait for the indicator light to show it’s ready—usually a few minutes.
- Prepare Your Sandwich: While it heats, assemble your sandwich. Layer fillings like cheese, veggies, or meats between two slices of bread. Adding a bit of butter or spread on the outside of the bread gives a golden, crispy finish.
- Lightly Grease the Plates: Lightly coat the sandwich maker plates with cooking spray or a small amount of butter to prevent sticking.
- Place the Sandwich Inside: Carefully open the sandwich maker and position your sandwich on the bottom plate, centering it for even cooking.
- Cook Your Sandwich: Close the lid gently, without forcing it. Let the sandwich cook for 3-5 minutes, depending on how crisp you prefer it.
- Check for Doneness: Open the sandwich maker to check if the bread is golden and crispy. If needed, close the lid and cook for another minute or so.
- Remove the Sandwich: Carefully use a silicone or wooden spatula to take out the sandwich to avoid scratching the non-stick surface.
- Cool and Enjoy: Let the sandwich cool briefly as it will be hot.
- Clean and Store: After unplugging and cooling, wipe down the plates with a damp cloth or sponge. Avoid using metal utensils, which can damage the non-stick coating, and store once dry.
What types of breads work best in a sandwich maker?
The best types of bread for a sandwich maker are those that hold up well to heat and fillings, giving you a crispy outside without falling apart. Here are some top choices:
- Regular Sliced Bread: Classic white or whole wheat bread works great for simple grilled cheese or basic sandwiches.
- Sourdough: Its thicker texture and slight tang add depth to grilled sandwiches, especially those with cheese and meats.
- Rye Bread: Great for hearty sandwiches, rye brings a rich flavor and holds up well to fillings like pastrami or Swiss cheese.
- Multigrain or Whole Grain: These breads are denser and can add a nutty flavor, making them perfect for vegetable or avocado sandwiches.
- Baguette or Ciabatta: For sandwiches with substantial fillings, crusty breads like baguette or ciabatta provide structure and a great crunch.
- Focaccia: For something different, focaccia’s herbed, chewy texture makes delicious pressed sandwiches.
Using one of these breads can elevate your sandwich, adding flavor, texture, and stability for toasting in the sandwich maker. Just avoid breads that are too soft, as they may get squished or not toast as evenly.
Avoid using too-thin or delicate bread, as it may fall apart or become misshapen.
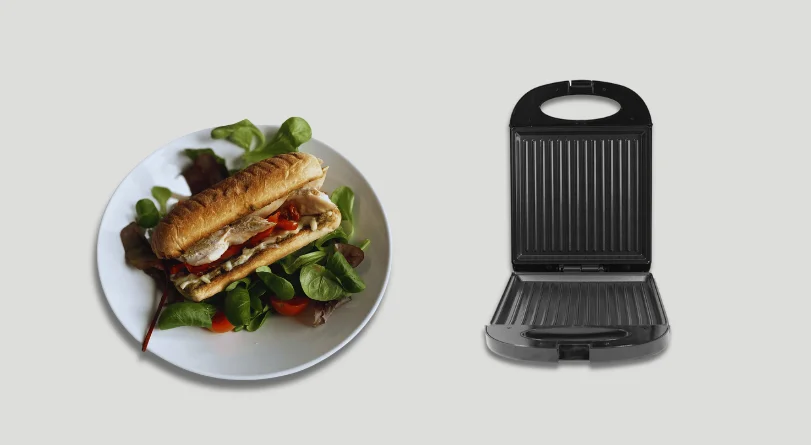
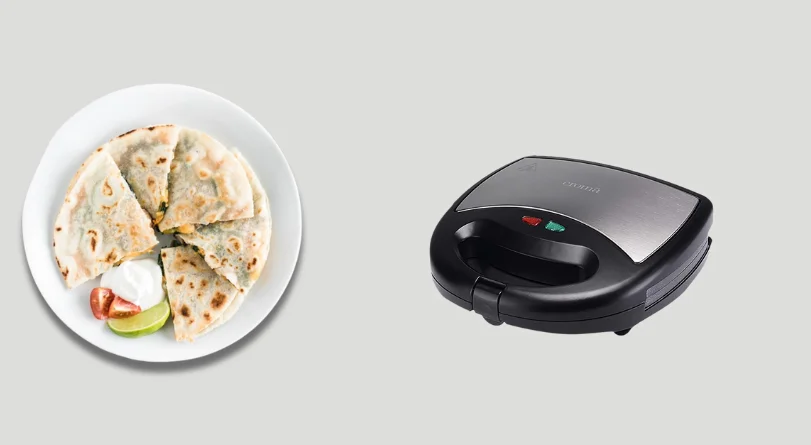
Can I make other foods in a sandwich maker, like omelets or quesadillas?
Yes, a sandwich maker can be used to make a variety of foods beyond sandwiches, including omelets and quesadillas! Here’s how to use it for these tasty options:
- Omelets:
- Preheat the sandwich maker and lightly grease the plates.
- Pour a small amount of beaten eggs directly onto the plates, then add any desired ingredients like cheese, vegetables, or ham.
- Close the lid and cook for about 3–5 minutes or until the eggs are fully set. The result is a fluffy, well-shaped omelet that’s easy to remove.
- Quesadillas:
- Preheat and lightly grease the plates.
- Place a small tortilla on the bottom plate, add fillings like cheese, beans, and cooked meats, and top with another tortilla.
- Close the lid gently and cook for 3–4 minutes or until the tortillas are golden and the cheese is melted.
- Use a spatula to remove the quesadilla, then slice into wedges.
- Other Ideas:
- French Toast: Dip bread slices in an egg mixture and cook in the sandwich maker for a quick French toast.
- Hash Browns: Shredded or pre-cooked hash browns can be pressed and crisped up.
- Pizza Pockets: Use pizza dough, add sauce, cheese, and toppings, then press them in the sandwich maker for a mini pizza pocket.
These foods work well because they’re simple, quick to cook, and benefit from even heat on both sides. Just remember to avoid overly liquidy ingredients and keep portions small to avoid spills.
Do I need to add oil or butter to the plates before using the sandwich maker?
No. When using a sandwich maker, it’s not necessary to add oil or butter to the plates. Most sandwich makers are designed to be non-stick so that food can be easily released without any added grease. Simply place your sandwich in the maker, close the lid, and cook according to the manufacturer’s instructions. This will help prevent excess oil or butter from dripping onto the surface and making a mess. Enjoy your freshly cooked sandwich!
However, for first-time use always lightly grease the plates before using your sandwich maker for the first time.
How long does it take to make a sandwich in a sandwich maker?
On average, a sandwich maker can cook a sandwich in 3-5 minutes. This includes toasting the bread, melting any cheese or butter, and heating the filling. Some sandwich makers may have faster or slower cooking times, so it’s best to consult the user manual for specific instructions. Additionally, the size and thickness of the sandwich can also impact cooking time.
The time it takes to make a sandwich in a sandwich maker varies depending on the type of sandwich and the machine’s speed.
Key points to remember:
- Heat setting: Adjust the heat setting based on your desired level of crispiness.
- Check for doneness: Watch for a golden brown color on the bread to know when your sandwich is ready.
- Sandwich type: Some thicker sandwiches with more fillings may take slightly longer to cook through.

What types of sandwiches can I make with a sandwich maker?
You can make a variety of delicious sandwiches with a sandwich maker. Some popular options include:
- Classic Grilled Cheese & Variants: Melt your favorite cheese, or add ingredients like ham, tomato, or avocado.
- Ham and Cheese / Monte Cristo: Ham and cheese variations, including the egg-battered Monte Cristo, offer a rich, crispy twist.
- Veggie Delight: Fill with veggies, like bell peppers, spinach, and pesto, or go for combinations like mushroom and goat cheese.
- Chicken & Avocado / BBQ Chicken Panini: Chicken sandwiches with avocado, BBQ sauce, or Havarti cheese provide hearty, protein-rich options.
- Breakfast Sandwiches: Assemble scrambled eggs, cheese, and meats, or try a French Toast Panini with Nutella and bacon.
- Pizza Panini: Create a pizza-inspired sandwich with marinara, mozzarella, and your favorite toppings.
- Toasted Subs: Load in sub ingredients like deli meats, cheeses, and veggies for a warm, melty sub experience.
- Quesadillas: Use tortillas with cheese and extras like beans or chicken for a quick quesadilla.
- Caprese Panini: Layer mozzarella, tomato, and basil with a drizzle of olive oil for a classic Italian-inspired panini.
- Sweet & Savory Combos: Experiment with combos like Apple, Arugula, and Brie for a sweet-savory bite.
How to clean and maintain Sandwich Makers?
To keep your sandwich maker in great shape, regular cleaning and maintenance are essential. After each use, unplug it, let it cool, and wipe the plates with a damp cloth to remove food residue. For removable plates, wash them in warm, soapy water.
Avoid abrasive cleaners to protect the non-stick coating. Occasionally, check for loose screws or cords and store it in a dry, cool place. Proper care extends the life of your sandwich maker and ensures consistently great results.
How should I clean a sandwich maker after each use?
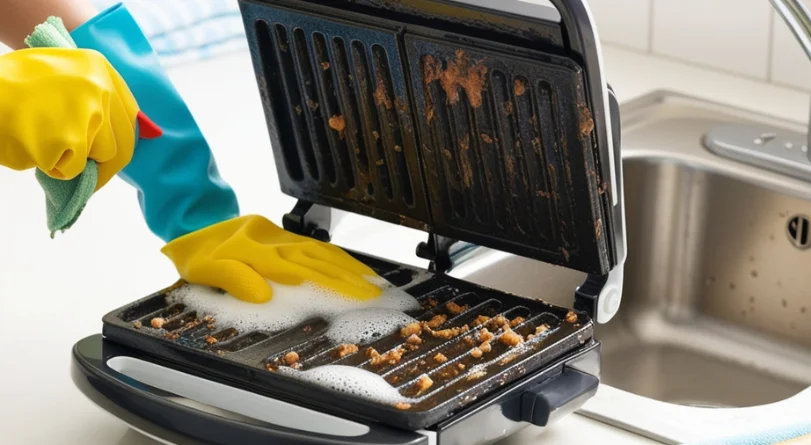
To clean a sandwich maker after use, unplug it and allow it to cool completely. Gently brush away any food particles with a soft brush or non-abrasive sponge. For stubborn spots, apply a paste made from baking soda and water, leaving it for 30 minutes before wiping it away with a damp cloth.
For tougher messes, you can also pour equal parts water and white vinegar on the plates, letting them sit for 10 minutes before wiping. Regular cleaning helps keep the appliance functioning smoothly.
Can I submerge my sandwich maker in water for cleaning?
No, you should never submerge your sandwich maker in water for cleaning as it can damage the electrical components inside the appliance; which can lead to safety hazards and reduce its effectiveness. Instead, clean your sandwich maker with a soft brush or cloth and a mixture of soap and warm water.
For tougher stains, mix baking soda and water to create a paste, and apply it to the affected area. Avoid using abrasive cleaners or scrubbers, as they can scratch the surface of the appliance. Regular cleaning will help maintain your sandwich maker’s performance and extend its lifespan.
What should I do if food is stuck on the plates?
If food is stuck on the plates, you should clean them thoroughly to prevent the buildup of bacteria and food residue. Here are some steps to follow:
- Scrape off excess food: Use a soft spatula or a paper towel to gently scrape off as much food as possible from the plate.
- Soak the plate: Fill a sink or a large container with warm water and add mild dish soap. Submerge the plate and let it soak for about 15-30 minutes.
- Scrub the plate: Use a soft-bristled brush or a non-abrasive scrubber to gently scrub away the stuck food.
- Rinse the plate: Rinse the plate thoroughly with warm water to remove any remaining food particles.
Are sandwich maker plates dishwasher-safe?
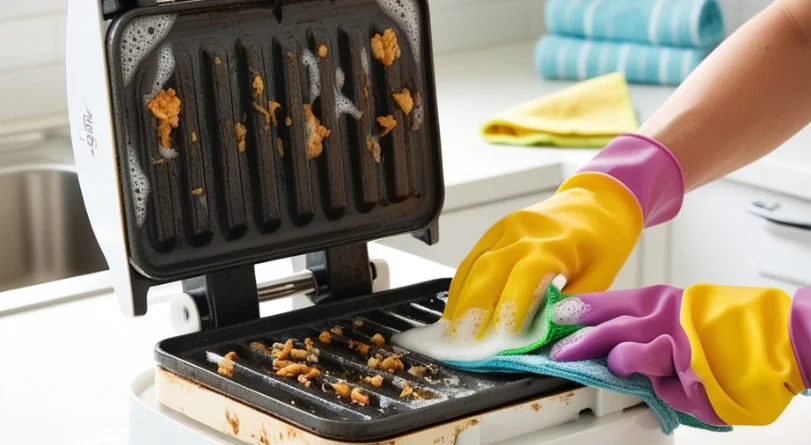
Whether sandwich maker plates are dishwasher-safe varies by model. Many sandwich makers, especially those with removable plates, are designed to withstand dishwasher cleaning. However, fixed plates generally require manual cleaning with a soft, damp cloth or sponge. If your model has a non-stick coating, avoid harsh detergents and abrasive scrubs to preserve the surface.
Always refer to the manufacturer’s instructions, which can be found in the manual, packaging, or product website, for precise care recommendations specific to your sandwich maker model.
How can I prevent food from sticking to the non-stick plates of the sandwich maker?
To prevent food from sticking to the non-stick plates of your sandwich maker, follow these tips:
- Grease the plates lightly: Before cooking, apply a thin layer of cooking spray or oil to the non-stick plates. This will help food release easily.
- Choose the right cooking surface: Ensure the plates are clean and dry before use. Do not use abrasive cleaners or scouring pads, they can damage the non-stick coating.
- Don’t overfill: Leave enough space between the food and the edges of the plates to allow for easy food release.
- Don’t press down: Resist the temptation to press down on the food with your spatula, as this can cause it to stick.
What Safety and Precautions I should follow while using sandwich makers?
When using a sandwich maker, follow these safety guidelines to ensure a safe experience. First, place it on a stable, heat-resistant surface to prevent overheating nearby objects. Use heat-resistant utensils to handle hot sandwiches and avoid touching the hot plates directly.
Always unplug the device after use and allow it to cool completely before cleaning. Keep the cord away from hot surfaces and ensure it’s stored safely to prevent damage. Regularly inspect the sandwich maker for any signs of wear to ensure ongoing safe operation.
Here are the safety measures you should follow:
Is it safe to leave a sandwich maker plugged in when not in use?
No, it is not safe to leave a sandwich maker plugged in when not in use; as with most electrical appliances, it’s best practice to always unplug it when you are not actively using it, especially since sandwich makers generate heat which could potentially cause a fire if left on accidentally or if a malfunction occurs.
Many modern sandwich makers have automatic shut-off features that turn off the appliance after a certain period of inactivity. However, it’s essential to check your sandwich maker’s user manual to see if this feature is available. Additionally, consider unplugging the appliance to avoid standby power consumption and reduce the risk of electrical shock or fires in the event of a malfunction.
Can I open the sandwich maker while it’s still hot?
No, you should not open a sandwich maker while it’s still hot. The temperature inside the sandwich maker can reach as high as 300°F (150°C), which can cause injury. It’s best to wait until the device has cooled down for a few minutes before opening it to avoid any potential hazards. You can also refer to the user manual for specific guidelines on handling and maintaining your sandwich maker.
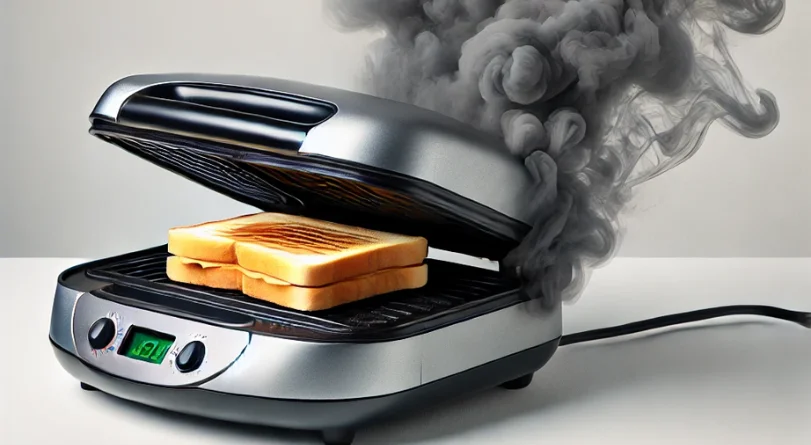
What should I do if the sandwich maker starts to smoke?
If the sandwich maker starts to smoke, it’s likely due to one of the following reasons:
- Excessive oil or grease buildup: This can cause the machine to overheat and smoke. Turn off the sandwich maker and unplug it. Let it cool down completely before cleaning it with a mixture of water and baking soda.
- Faulty heating element: If the heating element is damaged, it can produce smoke. In this case, it’s best to contact the manufacturer or a professional appliance repair service for assistance.
- Improper usage: Using the sandwich maker for non-food items or overloading it can cause it to smoke. Avoid using the machine for purposes other than making sandwiches and follow the manufacturer’s guidelines for usage.
Follow these quick steps in case the sandwich maker is emitting smoke:
- Unplug immediately: This is the priority when smoke appears.
- Let it cool down: Do not attempt to open or handle the sandwich maker while it’s hot.
- Check for food debris: Inspect the heating plates for any leftover food particles that could be causing the smoke.
- Clean thoroughly: Clean the plates with a damp cloth or sponge.
- Lower heat setting: Try using a lower temperature setting on your next attempt.
- Contact manufacturer: If the issue persists even after cleaning, reach out to the manufacturer for further guidance or potential repair options.
What safety features should I look for in a sandwich maker?
When choosing a sandwich maker, prioritize safety features like: cool-touch handles, heat-resistant outer casing, non-slip feet, locking mechanisms, automatic shut-off functions, power indicators, and a cord storage compartment to prevent burns, electrical shocks, and accidental mishaps while operating the appliance; always check if the appliance meets safety standards.
- Automatic Shut-Off: This feature automatically powers off the appliance when the cooking cycle is complete, reducing the risk of overheating or accidental fires.
- Cool-Touch Exterior and Handles: Look for sandwich makers with heat-resistant exteriors and cool-touch handles to prevent burns. These features make handling the device safer, even when it’s hot.
- Heat-Resistant Casing: The outer casing should be constructed from materials that don’t retain heat excessively, adding an extra layer of safety if the appliance is accidentally touched while in use.
- Non-Slip Feet: Rubberized or anti-slip feet keep the sandwich maker secure on the counter, preventing it from sliding around while in use. This feature is especially helpful in busy kitchens or households with children.
- Locking Mechanism: A secure latch or lock keeps the plates closed during cooking, particularly useful when making thick sandwiches. This prevents ingredients from spilling and ensures even cooking.
- Thermal Cut-Off: This is an additional safety feature that automatically interrupts the power supply if the appliance overheats, offering extra protection.
- Power Indicator Lights: Look for clear indicator lights showing when the sandwich maker is on and ready for use. This visual cue ensures that you don’t accidentally touch the device when it’s still hot.
- Cord Storage: A designated area for cord storage helps keep the countertop organized and prevents the cord from accidental tugging or snags, enhancing overall kitchen safety.
When buying a sandwich maker, ensure it includes these features to make cooking both convenient and safe.

Are sandwich makers safe for kids to use?
Yes, sandwich makers can be safe for kids to use under careful adult supervision. Many models come with features that enhance safety, such as automatic shut-off to avoid overheating. It’s important to guide children on proper usage, including not overfilling the maker, keeping fingers clear, and standing back to avoid contact with heat or steam.
When selecting a sandwich maker for kids:
- Look for heat-resistant handles that stay cool to the touch and provide a firm grip, reducing the risk of burns.
- A locking mechanism is also essential, as it secures the plates during use, preventing spills and ensuring even cooking.
Place the sandwich maker on a stable, heat-resistant surface, and always follow manufacturer guidelines for safe use.
What should I consider when purchasing a sandwich maker?
When buying a sandwich maker, focus on factors like size, non-stick surfaces, and power capacity. Ensure it has features like temperature control and safety mechanisms to avoid burns and enhance usability. Check for dishwasher-safe, removable plates for easy cleaning, and prioritize a model that fits your space and usage frequency.
Here are some factors to consider while buying a sandwich maker:
What should I consider when buying a sandwich maker?
When buying a sandwich maker, key considerations include: non-stick coating for easy cleaning, power wattage for quick cooking, temperature control for precise toasting, interchangeable plates for variety, cool-touch handles for safety, size to fit your needs, and a reputable brand for quality and durability; also check for additional features like drip trays and automatic shut-off functions.
- Size and Capacity: Select a size that fits your lifestyle and kitchen space. A larger sandwich maker is great for families or gatherings, allowing multiple sandwiches at once, while a compact option suits smaller households or limited counter space.
- Power and Heating: Look for a higher wattage, as this usually means faster heating and more efficient cooking. Even heating elements are essential to ensure both sides toast evenly, creating a consistent crunch.
- Non-Stick Surface: A quality non-stick coating prevents food from sticking, making both cooking and cleaning easier. Choose a non-stick material that’s durable and free from chemicals like PFOA and PFOS for safety.
- Temperature Settings: Adjustable temperature controls give you the flexibility to toast sandwiches to your liking—whether lightly toasted or crispy brown. This feature is particularly useful if you enjoy experimenting with different types of sandwiches.
- Safety Features: Look for safety features like heat-resistant handles, indicator lights, and an automatic shut-off. Heat-resistant handles allow safe handling, while indicator lights show when the appliance is on. An automatic shut-off function helps prevent overheating.
- Ease of Cleaning: Cleaning should be simple. Models with removable, dishwasher-safe plates make cleanup fast and thorough. Non-stick plates also reduce the chance of stubborn residue, so you can easily wipe down the appliance after use.
- Brand Reputation and Customer Feedback: Go for brands known for quality and reliability. Reading customer reviews offers insights into how well a model performs and holds up over time. Reviews from other buyers can reveal details about durability and usability.
- Warranty and Support: A good warranty adds peace of mind, covering repairs or replacements if issues arise. Strong customer service from the brand can also be a big help if you need assistance or parts down the line.
These considerations will help you pick a sandwich maker that’s safe, functional, and easy to use for many meals to come.

What’s the best wattage for a sandwich maker?
For general home use, a sandwich maker with a wattage between 700 to 1000 watts is usually ideal. Lower wattage models, around 400-600 watts, are fine for simple toasting but may take longer, especially with thicker sandwiches or denser breads. For faster cooking and more versatility—such as making paninis or grilling thicker sandwiches—a higher wattage, up to 1000 watts, is recommended.
Some advanced models even go up to 1600 watts for professional-style results (Taylor Swoden and Cattleman Cuisine grill sandwich maker). But for typical home use, 700-1000 watts offers a good balance of speed and energy efficiency.
How much does a good-quality sandwich maker cost?
A good quality sandwich maker cost in the US:
On average, a basic sandwich maker can cost between $20 to $50, while a high-end model with advanced features like non-stick coating, variable heat control, and large cooking surfaces can cost between $50 to $150. The cost of a good-quality sandwich maker in the US can vary depending on the brand, model, and features.
Some popular brands like Black+Decker, Cuisinart, and Breville offer a range of sandwich makers with prices falling within this range. You can find them at most department stores, online marketplaces, or specialty kitchen stores.
A good quality sandwich maker cost in the UK:
A good-quality sandwich maker in the UK can cost anywhere from £20 to £100, depending on the brand, features, and capacity. Basic models with simple designs can be found for around £20-£30, while more advanced models with multiple functions, non-stick coatings, and large capacities can cost upwards of £50-£100.
Some popular brands in the UK, such as Breville and Tefal, offer a range of sandwich makers at different price points. It’s worth noting that prices may vary depending on the retailer and any sales or discounts that may be available.
Are there sandwich makers with interchangeable plates?
Yes, there are sandwich makers with interchangeable plates. These machines are often referred to as panini presses or sandwich grills with interchangeable plate systems. They typically come with multiple plates of different sizes and materials, such as stainless steel, non-stick, or cast iron, which can be swapped out to accommodate various types of sandwiches or cooking tasks.
Interchangeable plates can be a convenient feature for those who want to experiment with different cooking techniques or make multiple types of sandwiches in one machine. Brands like Breville, Cuisinart, and Oster offer sandwich makers with interchangeable plates.
Do sandwich makers come with temperature control settings?
Sandwich makers, also known as panini presses or grill presses, typically come with temperature control settings to allow for adjustable heat. This feature enables users to cook sandwiches at various temperatures, from lightly toasted to crispy and golden brown.
The temperature range may vary depending on the specific model, but most sandwich makers have controls for high and low heat, as well as some models with precise temperature adjustments. Having temperature control settings is a common feature among modern sandwich makers, making it easier to achieve the perfect cooking result.
How can I troubleshoot a sandwich maker?
For sandwich maker issues, start by checking the power source and ensuring the appliance is correctly plugged in. If it doesn’t heat up, inspect for blown fuses or tripped breakers. Regularly clean the plates to prevent residue build-up, which can cause uneven cooking.
For stuck plates or persistent odor, try a mild cleaning solution. If problems continue, refer to the user manual or contact customer support, as these steps often cover the most common issues.
Here are some detailed troubleshooting guides:
Why is my sandwich maker not heating up properly?
There could be several reasons why your sandwich maker is not heating up properly. First, check if the appliance is properly plugged in and if the outlet is working. Next, ensure that the heating element is clean and free from any blockages. If the heating element is removable, try cleaning it with a soft brush or cloth. Additionally, check the thermostat or temperature control for any issues.
It’s also possible that the heating element may be faulty, in which case it may be worth considering replacing it or consulting the user manual for further troubleshooting steps.
Why do the plates (in the sandwich maker) sometimes leave an uneven toast on the bread?
The uneven toast in a sandwich maker can be caused by several factors. One reason is the uneven heating of the plates. Over time, the non-stick coating on the plates can wear off, leading to hotspots and inconsistent heat distribution. This can result in one side of the bread being toasted more than the other. Additionally, if the bread is not placed evenly on the plates or if the plates are not cleaned properly, it can also cause uneven toasting. Regular cleaning and maintenance of the sandwich maker can help prevent this issue.
What should I do if the non-stick coating starts to peel?
Immediately stop using the sandwich maker if the non-stick coating begins to peel. This is crucial because loose coating can potentially end up in your food, posing a safety risk. Here are your next steps:
- Inspect the damage: Check how severe the peeling is. If it’s minimal, you might be able to manage it, but if it’s extensive, the sandwich maker may need to be replaced.
- Contact the manufacturer: Reach out to the manufacturer’s customer service to inquire about replacement plates or any possible solutions they might offer.
- Maintain and care for the surface: If you decide to continue using the sandwich maker for a short period, ensure you clean it gently with mild soap and a soft scrubber. Apply a non-stick cooking spray or seasoning to help maintain the surface.
- Consider replacement: If the peeling is severe, it’s best to start looking for a new sandwich maker to ensure the safety and quality of your food.
Why does my sandwich maker have a burnt smell after use?
It’s not uncommon for a sandwich maker to have a burnt smell after use, especially if you’re using it frequently. There are a few possible reasons for this:
- One reason could be residue buildup: food particles, oils, and other substances can accumulate on the non-stick surface or in the crevices of the maker, causing a burnt smell when heated.
- Another reason might be improper cleaning: if you’re not cleaning your sandwich maker regularly, food residue can harden and smoke when heated, leading to a burnt smell.
- Lastly, it could be a sign of a worn-out non-stick coating: if the coating is damaged or worn out, it can start to flake off and produce a burnt smell when heated.
To eliminate the burnt smell, try cleaning your sandwich maker thoroughly with soap and water. Use a soft sponge or cloth to remove any food residue, and dry the maker completely before storing. If the smell persists, you may need to replace the non-stick coating or consider purchasing a new sandwich maker.
Here are some tips to help prevent burnt smells from your sandwich maker:
- Clean the sandwich maker regularly: After each use, wipe down the non-stick surface and crevices with a damp cloth to remove any food residue. This will prevent the buildup of debris that can cause burnt smells.
- Use a gentle cleaning solution: Avoid using abrasive cleaners or scouring pads, as they can damage the non-stick coating. Instead, use a mild soap and water solution to clean the sandwich maker.
- Dry the sandwich maker thoroughly: After cleaning, make sure to dry the sandwich maker completely before storing it. This will prevent moisture from accumulating and causing bacterial growth, which can lead to unpleasant odors.
- Use a non-stick spray or oil: Applying a non-stick spray or oil to the sandwich maker’s surface can help.
Can I repair a broken sandwich maker, or should I replace it?
Repairing a broken sandwich maker is possible, but it depends on the severity of the issue. If the problem is with a loose part or a faulty heating element, you might be able to fix it with some basic tools and replacement parts. However, if the issue is with the electrical or mechanical core of the device, it may be more cost-effective to replace it.
Consider the cost of repairs versus the cost of a new sandwich maker, as well as the warranty and lifespan of the product.
Easy sandwich maker recipes
Here are some guides for making foods using sandwich makers:
What are some easy sandwich recipes for a sandwich maker?
A sandwich maker’s delight! Here are some easy sandwich recipes to get you started:
- Classic Club: This triple-layered delight features turkey, crispy bacon, lettuce, tomato, and a smear of mayonnaise, with melted cheddar adding a rich finish. Perfectly layered, it’s toasted on three slices of bread for a golden crunch. Press in a sandwich maker until golden brown for a warm, satisfying meal.
- Italian Stallion: This hearty, Italian-inspired sandwich combines salami, ham, and pepperoni with provolone, crisp lettuce, and a touch of Italian dressing. The crusty sub roll is pressed in the sandwich maker, creating a warm, flavorful bite where the meats meld deliciously with the melted cheese.
- Veggie Delight: Light yet packed with flavor, this sandwich pairs creamy hummus with fresh cucumber, bell peppers, sprouts, and avocado on whole wheat bread. Toast it briefly to warm up the hummus and soften the veggies for a healthy, comforting sandwich.
- BLT Brunch: Classic bacon, lettuce, and tomato get an upgrade with a fried egg. Cooked to perfection in the sandwich maker, the bacon becomes crisp, the tomato sweet, and the egg adds a rich, brunch-like texture.
- Grilled Cheese Supreme: Ham and cheese are the stars of this gooey, toasted classic. Melted cheese wraps around the ham, and toasting in a sandwich maker makes it irresistibly crisp on the outside and warm on the inside.
Can I use frozen ingredients in a sandwich maker?
Yes, you can use frozen ingredients, including frozen bread, in a sandwich maker; most sandwich makers can cook frozen bread and fillings, allowing you to make a toasted sandwich directly from the freezer, although it might take a bit longer to cook properly.
What problems I may face while using frozen ingredients in a sandwich maker?
Here are some problems you might face while preparing foods using frozen ingredients in a sandwich maker:
- Uneven cooking: Frozen ingredients take longer to cook than fresh ones. Using them in a sandwich maker can result in uneven cooking, with the bread potentially burning before the frozen ingredients are fully heated or cooked.
- Excess moisture: Frozen ingredients release water as they thaw, which can make your sandwich soggy and affect the overall texture and taste.
- Potential damage to the appliance: The sudden change in temperature when placing frozen ingredients on the hot plates of the sandwich maker can potentially cause warping or damage to the non-stick coating over time.
Instead, consider the following alternatives:
- Thaw ingredients first: Allow frozen ingredients to thaw completely in the refrigerator before using them in your sandwich maker. This will help ensure even cooking and maintain the quality of your sandwich.
- Preheat or precook ingredients: If you’re using frozen meat or other ingredients that require cooking, precook or heat them according to package instructions before assembling your sandwich.
- Use fresh ingredients: Whenever possible, opt for fresh ingredients to achieve the best results and taste in your sandwiches.
How can I make my sandwiches crispy without burning them?
To make crispy sandwiches without burning them, try the following techniques:
- Preheat your sandwich maker: Before placing your sandwich inside, make sure the sandwich maker is properly preheated. This helps to create a crispy exterior right from the start.
- Use the right bread: Opt for bread that has a tendency to crisp up nicely, such as sourdough, ciabatta, or even regular sandwich bread. Avoid overly soft or moist bread, as these can become soggy or burn more easily.
- Dry ingredients: Ensure that your ingredients are not overly wet or moist. Pat down ingredients like tomatoes or pickles with a paper towel to remove excess moisture, which can make the bread soggy and prevent crisping.
- Butter or oil: Lightly butter the outside of your bread or brush it with a small amount of oil. This helps to create a crispy, golden crust. Be careful not to use too much, as excess butter or oil can cause the bread to burn.
- Even heat distribution: Place your sandwich in the center of the sandwich maker to ensure even heat distribution. This helps to crisp the bread evenly without burning spots.
- Monitor cooking time: Keep an eye on your sandwich as it cooks. Cooking times can vary depending on the type of bread and the ingredients used. Check the sandwich periodically to ensure it’s not burning.
- Adjust temperature: If your sandwich maker has temperature settings, start with a medium heat setting. If the sandwich is browning too quickly, reduce the heat. If it’s not crisping up, increase the heat slightly.
- Use a timer: Set a timer to help you keep track of the cooking time. This can prevent you from getting distracted and accidentally burning your sandwich.
- Flip if necessary: If your sandwich maker doesn’t cook both sides evenly, consider flipping the sandwich halfway through the cooking time to ensure both sides get crispy.
- Let it rest: After removing the sandwich from the maker, let it rest for a moment on a cooling rack or a paper towel. This allows any residual steam to escape, helping to maintain the crispiness.
What toppings or condiments work well in sandwiches made with a sandwich maker?
For a well-balanced sandwich, choose toppings that enhance each other’s flavors. A great combination is creamy brie cheese, spicy pepper jelly, and cured salami. Another pairing is honey ham with sharp cheddar and a spread of spicy whole-grain mustard on whole-grain bread. These combinations provide a contrast of creamy, spicy, and savory notes, making for a flavorful sandwich.
Faq’s: Sandwich makers
What is the temperature of a sandwich maker?
Temperature range of a sandwich maker is from 250°F to 400°F (120°C to 200°C). Some high-end models may reach temperatures as high as 425°F (220°C). However, the temperature of a sandwich maker can vary depending on the specific model.
Do you need to preheat the sandwich maker?
Yes, you should preheat a sandwich maker before using it. Electric sandwich makers usually require preheating for 2-5 minutes, depending on the model, to reach the optimal temperature for cooking. Non-stick or griddle-style sandwich makers may not need preheating, but it’s still a good idea to let them heat up for a minute or two to ensure even cooking.
What should I pay attention to when buying a sandwich maker?
When buying a sandwich maker, there are several factors to consider. First, think about the type of sandwiches you want to make most often. Do you prefer paninis, grills, or just toasted sandwiches? This will help you choose the right type of maker. Next, consider the size of the maker and the number of people you’re planning to make sandwiches for. Also, look for a maker with adjustable heat control and a non-stick surface for easy cleaning. Some makers also come with additional features like timers and LED displays, so think about whether these are important to you.
How long does it take to preheat a sandwich maker?
Preheating a sandwich maker typically takes 2-5 minutes, depending on the model and type of cooker. Some sandwich makers may have a quick-start feature that can heat up in as little as 1-2 minutes, while others may take a bit longer to reach the optimal temperature.
What are the disadvantages of a sandwich maker?
Limited Versatility: Sandwich makers are designed primarily for making sandwiches and may not be suitable for other types of cooking.
Cleaning Difficulty: Some sandwich makers can be challenging to clean, especially if they have non-removable plates.
Limited Capacity: Most sandwich makers can only accommodate one or two sandwiches at a time, which can be inconvenient for larger families or gatherings.
Uneven Heating: Some models may not heat evenly, leading to inconsistent toasting.
How do I know when my sandwich maker is ready?
Most sandwich makers will have an indicator light that turns on when the appliance is heated up and ready to use; typically, a green light will signify it’s ready to cook your sandwich. Look for a dedicated “ready” or “power” light on your sandwich maker that will illuminate when it’s reached the proper temperature.
Is it normal for a sandwich maker to smell weird after first use?
Yes, it’s fairly normal for a new sandwich maker to have a slightly strange smell the first time you use it, as this is often due to a “burn-off” of manufacturing residue or dust accumulated on the heating elements during storage; this smell should dissipate after a few uses with proper cleaning.
How to get rid of the burnt smell in a sandwich maker?
Unplug the appliance and let it cool down completely.
Mix 1 tablespoon of baking soda with 1 tablespoon of water to form a paste.
Apply the paste to the interior surfaces of the sandwich maker, including the heating elements and plates.
Let it sit for 2-3 hours or overnight to allow the baking soda to absorb the odor.
Wipe clean with a damp cloth and dry thoroughly before using the sandwich maker again. Regular cleaning and maintenance can also prevent future burnt smells.
Why is smoke coming out of my toaster?
Smoke can come out of a toaster for several reasons:
First Use: Initial heating of the internal components.
Burnt Food: Residual food particles burning.
Overheating: Using the toaster for too long without a break.
Malfunction: A faulty heating element or other internal issue.
Why is my sandwich maker not working?
There could be several reasons why a sandwich maker is not working:
Power Issues: Check if the appliance is properly plugged in and the outlet is functioning.
Faulty Heating Element: The heating element may be damaged.
Thermostat Issue: The thermostat may be malfunctioning.
Internal Wiring: There could be a wiring issue inside the appliance.
How do you maintain a sandwich maker?
Clean Regularly: Wipe the plates with a damp cloth after each use and remove any crumbs.
Avoid Overheating: Do not leave the sandwich maker on for extended periods without use.
Store Properly: Store the sandwich maker in a dry place when not in use.
Inspect for Damage: Regularly check for any signs of wear or damage to the heating elements and wiring.
Can you put frozen bread in a sandwich maker?
Yes, you can use frozen bread, though it may take slightly longer to achieve the desired crispness. Toasting directly from frozen is safe and can yield a crispy result. It is generally not recommended to put frozen bread directly into a sandwich maker. The uneven heating can result in inconsistent toasting and may damage the appliance.
What sandwich ingredients should not be frozen?
Ingredients that do not freeze well include:
Lettuce and Other Leafy Greens: They become soggy and lose their texture.
Tomatoes: They become mushy and watery.
Cucumbers: They lose their crunch and become watery.
Mayonnaise-Based Sauces: They can separate and become watery.
How long must sandwich ingredients be defrosted before use?
Generally, ground meats, poultry, and seafood should be defrosted for 30 minutes to 2 hours in the refrigerator. Larger items like roasts or whole turkeys may take 24 hours or more to defrost in the fridge. You can also defrost ingredients quickly by submerging them in cold water, changing the water every 30 minutes, but be sure to cook them immediately after.
Wrapping up: How sandwich makers work and what to expect
Sandwich makers are versatile, convenient kitchen appliances that elevate the simplicity of a sandwich by adding deliciously crisp textures and warm fillings. With features tailored to various preferences and safety mechanisms in place, they’re suitable for both beginners and seasoned cooks alike.
When used with attention to care and maintenance, sandwich makers can provide years of flavorful meals. Understanding key functions, cleaning steps, and safety precautions will ensure that your appliance works efficiently and continues to produce great results.
